I finally have had success in programming my Uniden BCD436 (and would probably succeed with the Uniden BCD586 if I owned one) under Wine! This has been a problem that has persisted for ages, and now it appears that things have advanced enough that it’s possible.
Installation#
First, uninstall Wine: (warning: this will blow away all your Wine configs, so if you use it for more than just Sentinel, save everything first)
$ sudo apt remove wine
$ sudo apt autoremove
Next, install Wine from the WineHQ repo by adding the winehq key, adding it to your list of repos, and instaling the package (these instructions come from https://wiki.winehq.org/Ubuntu):
$ sudo wget -O /etc/apt/keyrings/winehq-archive.key https://dl.winehq.org/wine-builds/winehq.key
$ sudo wget -NP /etc/apt/sources.list.d/ https://dl.winehq.org/wine-builds/ubuntu/dists/jammy/winehq-jammy.sources$ wine --versionwine-8.0.2
Install Sentinel. Download it from info.uniden.com and you’ll have a zip file with a name like: BCDx36HP_Sentinel_Version_2_xx_yy.zip
$ unzip BCDx36HP_Sentinel_Version_2_xx_yy.zip$ cd BCDx36HP_Sentinel_Version_2_xx_yy$ wine setup.exe
Follow the normal Sentinel setup procedure.
I’ve got Sentinel data files stored on my shared drive. Because of this, I had to do the following to get it reading my shared config. You probably won’t do this:
Start Sentinel and download the master database.
Exit Sentinel
cd ~/.wine/drive_c/users/_myuser_/Documents/Unidenmv BCDx36HP BCDx36HP-oldln -s /my/shared/uniden/data-directory BCDx36HP(this is the directory on the SMB share that contains ActivityLog, DiscoveryLog, FavoriteLists and Profile)Start Sentinel again and confirm you can read it.
Exit Sentinel
Using Sentinel#
I adapted these instructions from https://wiki.radioreference.com/index.php/Sentinel_(Uniden_software)#Using_Sentinel_Under_Wine
Step 1: Connect the BCD436 to your Linux device by turning it on and selecting “Mass Storage Mode” (press the E/yes key). You’ll see it automount on Linux.
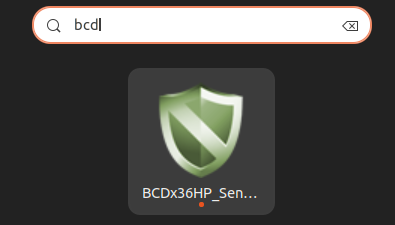
Step 2: Start Sentinel by clicking on Activities in the upper left and typing bcd, then clicking on the icon:
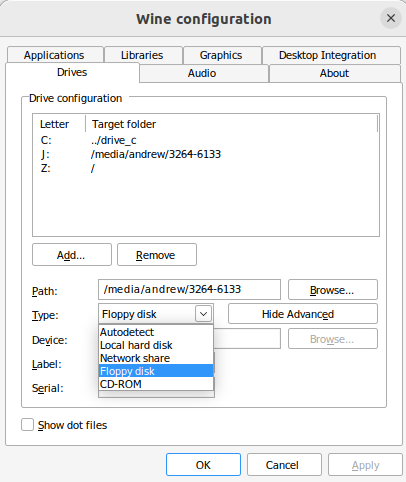
Step 3: Cancel out of the “Run updates” dialog. Instead, run winecfg from the terminal.
Step 4: In the dialog that comes up, click the Drives tab and then use cursor down to highlight the drive letter of the /media/ path that Ubuntu used when it automounted the drive.
Step 5: Click “Show Advanced” and change the Type from “Autodetect” to “Floppy Disk”. Press “Apply” and then “OK”.
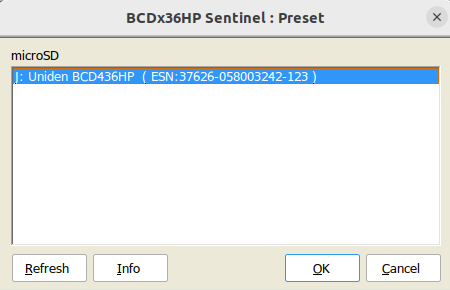
Step 6: In Sentinel, Update -> Update Firmware…
If all went well, you should see:
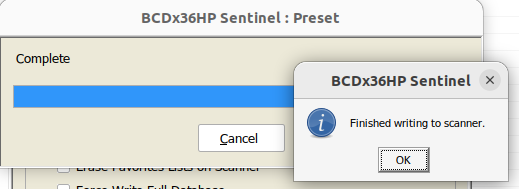
Step 7. Click OK. Your firmware just got updated.
At this point you should be able to Update -> Update Master Database(HPDB). You can also make changes. Once you’ve made your changes, Scanner -> Write to Scanner…
Note: the Linux driver that talks to the scanner can be very slow when writing. You’ll have plenty of time to get a coffee, especially if you select “Force Write Full Database”. Just remember to come back in time to tell Sentinel how to handle conflicts.
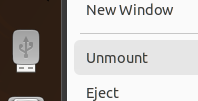
Step 8: When you’re done, shut down Sentinel and then unmount the device, then eject it:
Turn the radio off. Then unplug the cable. Congratulations, you’re done.
Reply by Email