I’ve been wanting to play with Forgejo for a while. It’s the open source DevOps platform behind Codeberg and I like the idea of self-hosted automation. I wanted a minimal one — I didn’t need mail but I wanted automation on push.
If you know Docker (the current version of Docker) you’ll find it pretty easy to install. Here’s how to do it.
Pull Forgejo from Docker#
- Ubuntu 24.04 doesn’t come with the new Docker, or sqlite3. So:
sudo apt install docker-compose-v2 sqlite3- Grab the Docker image:
docker pull codeberg.org/forgejo/forgejo:14- Create a docker-compose.yaml based on the one at forgejo.org/docs/next/admin/installation/docker/. I changed three places the
USER_UID,USER_GID, and the path to the volume (I used a hard-coded one rather than./forgejo. The file I ended up with was:
networks:
  forgejo:
    external: false

services:
  server:
    image: codeberg.org/forgejo/forgejo:14
    container_name: forgejo
    environment:
      - USER_UID=2000
      - USER_GID=2000
    restart: always
    networks:
      - forgejo
    volumes:
      - /data/shared/forgejo/forjego:/data ← was ./forgejo:/data
      - /etc/localtime:/etc/localtime:ro
    ports:
      - '3000:3000'
- '222:22'- Bring the image up:
docker compose up -dOpen a browser on the host’s port 3000 (which I’ll call myforgejoserver.acornwall.net:3000) to initialize Forgejo.
In the browser, leave everything as default except the server domain and base URL. That means I’m using the default sqlite
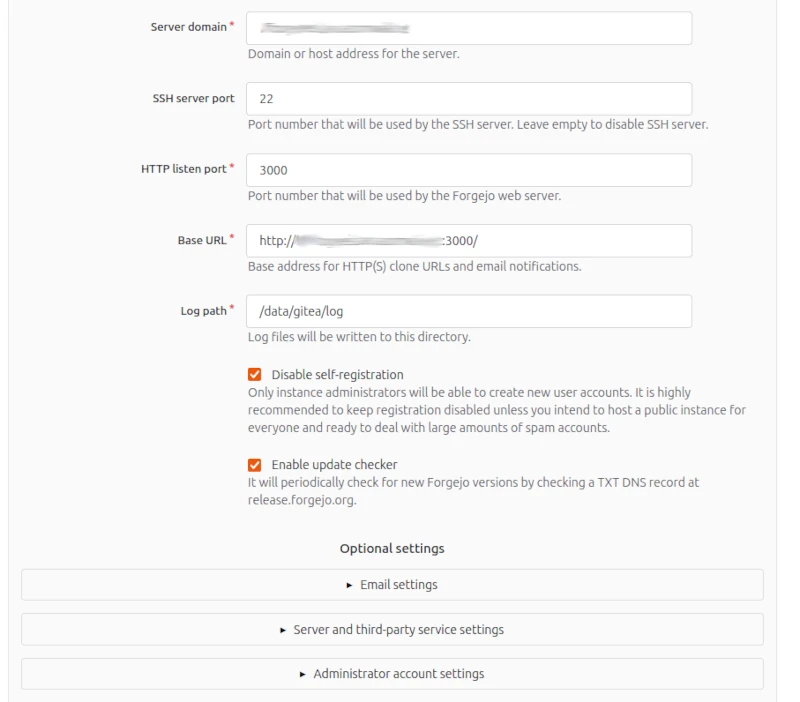
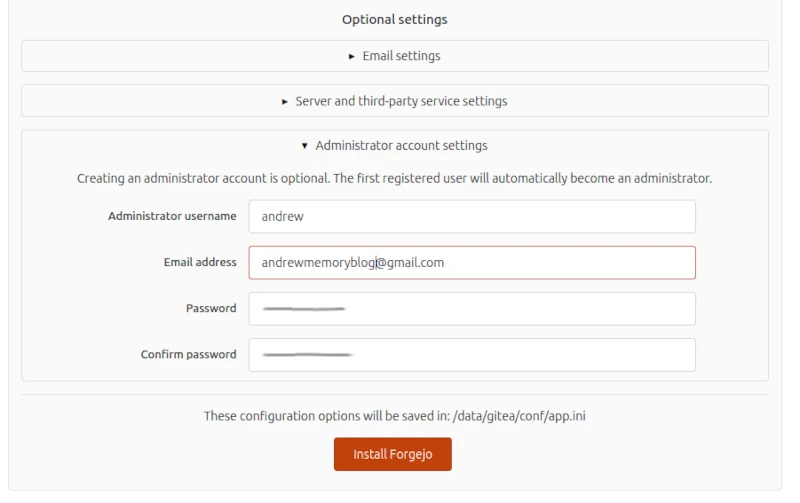
- I skipped email settings and server/third-party service settings, and entered the administrator account settings, then clicked Install Forgejo:
- Next I restarted Forgejo and made sure that the settings stuck. If you have the storage volume wrong in the docker-compose.yaml, as I did the first time, you get to enter everything again after fixing it.
docker compose down
docker compose up -d
Creating a Git Repo Into Forgejo#
Once things were set up, I could log in and create a repo in Forgejo. Here’s what I did.
Navigate to the + dropdown and click “New repository”.
Fill out the form. I called my repo “andrewmemory” and set my user as the owner. I checked “Make repostitory private.” I also checked “Initialize repository” which lead to some issues later, but hey, it looked good at the time. I added both “Emacs” and “Hugo” to .gitignore — I didn’t realize I could do both the first time I tried. I went with CC-BY-NC-ND-4.0 for the license. Then I clicked “Create repository.”
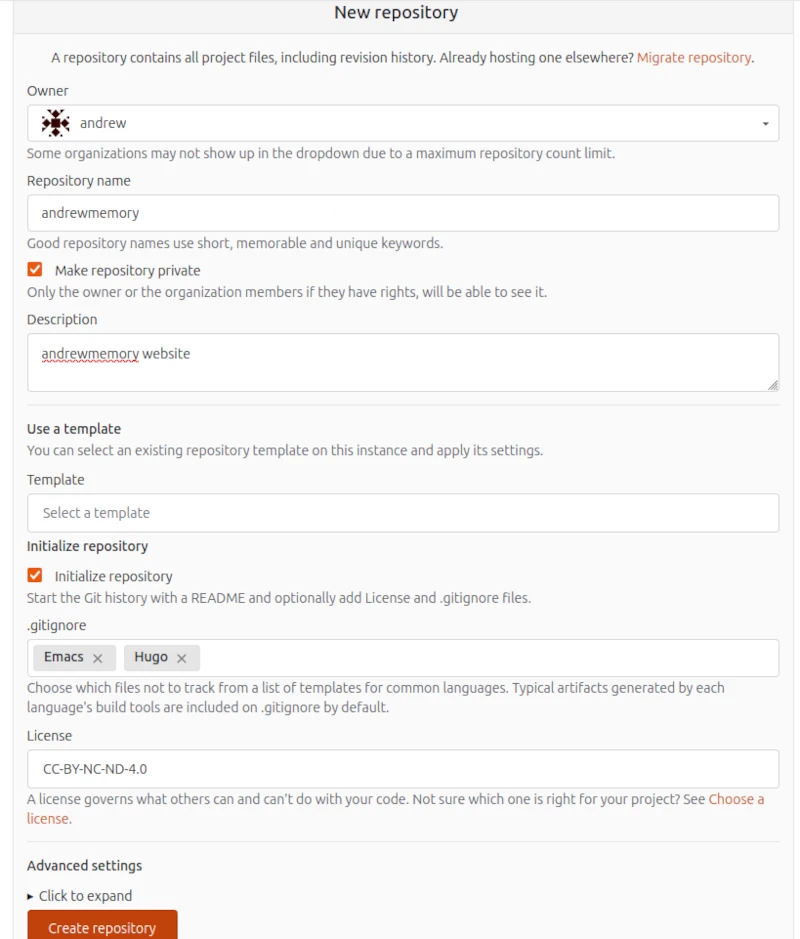
There, the repo is created!
Verifying your public key#
Once the repo was created on Forgejo, I needed to add my private cert to Forgejo. That meant clicking the dropdown on the right with my avatar, clicking “Settings,” then navigating to “SSH / GPG keys”. From there I could click “Add key” under SSH Keys. I pasted my public key in there. Then click “Add key.”
Once you’ve done that, you’ve got something like this. Click “Verify”:

After clicking verify, you’re presented with a token and a string to paste into a terminal. Copy the string, paste it into the terminal, but edit the filename if your private key is not
id_ed25519.
echo -n 'ee2cd80b5f8f4e95800ddca4d92053998bc3f8e7a9cc1dd60fe30e7ad83b87d6' | ssh-keygen -Y sign -n myforgejoserver.acornwall.net -f ~/.ssh/id_rsa- Running that command will dump a wad into your terminal that looks like this:
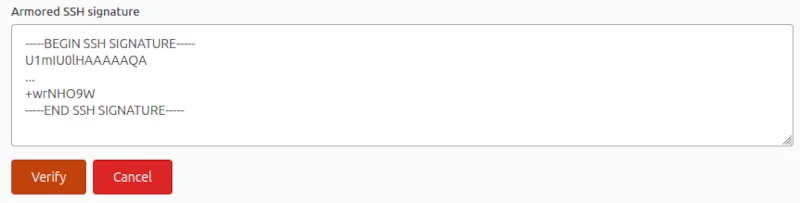
-----BEGIN SSH SIGNATURE-----
U1mIU0lHAAAAAQA
...
+wrNHO9W
-----END SSH SIGNATURE-----
Copy the whole wad including the BEGIN and END parts, then paste that into the section that says “Armored SSH signature” and press the “Verify” button.
If you’ve done everything right your key is now verified.
Connecting the old repo#
Finally, I could start moving my website (which is in a git repo on disk) into Forgejo. That wasn’t terrible, although it took me a couple of tries because I wasn’t sure how to do it. Here’s what I did.
cd andrewmemory-hugo
git remote rm origin # It took me a couple of tries, so I had to remove the old origin
git remote add origin ssh://git@myforgejoserver.acornwall.net:222/andrew/andrewmemory
git pull --allow-unrelated origin main
This resulted in a bunch of merge conflicts in .gitignore that I manually took care of. Once that was done, I could:
git push --set-upstream origin mainSetting Forgejo to restart after reboot#
This is all groovy, but next time I install Linux patches, I’m going to have to reboot my machine. So I created a systemd (boo) service to do that.
[Unit]
Description=Forgejo
After=docker.service
Requires=docker.service

[Service]
Type=oneshot
RemainAfterExit=yes
ExecStart=/bin/bash -c "/usr/bin/docker-compose -f /data/shared/forgejo/docker-compose.yaml up --detach"
ExecStop=/bin/bash -c "/usr/bin/docker-compose -f /data/shared/forgejo/docker-compose.yaml down"

[Install]
WantedBy=multi-user.target
Then, I made sure it worked and enabled it on boot:
sudo systemctl start forgejo
sudo systemctl status forgejo
sudo systemctl stop forgejo
sudo systemctl enable forgejo
sudo systemctl start forgejo
Ok, Forgejo is set up!
Reply by Email